Forwarding from Gmail
Forwarding is how the letters reach PdayPost: you send each weekly email on to your mission's private address, and PdayPost reads it from there.
Gmail on the web, at mail.google.com. The phone app can forward one letter; the other two moves are set up on a computer.
The mission's address
first.last@pdaypost.com
Each mission has its own address, shown on the mission's home once you create it.
How to send the letters from Gmail
The steps on video (no sound, with captions)
Many letters, a few at a time, on a computer
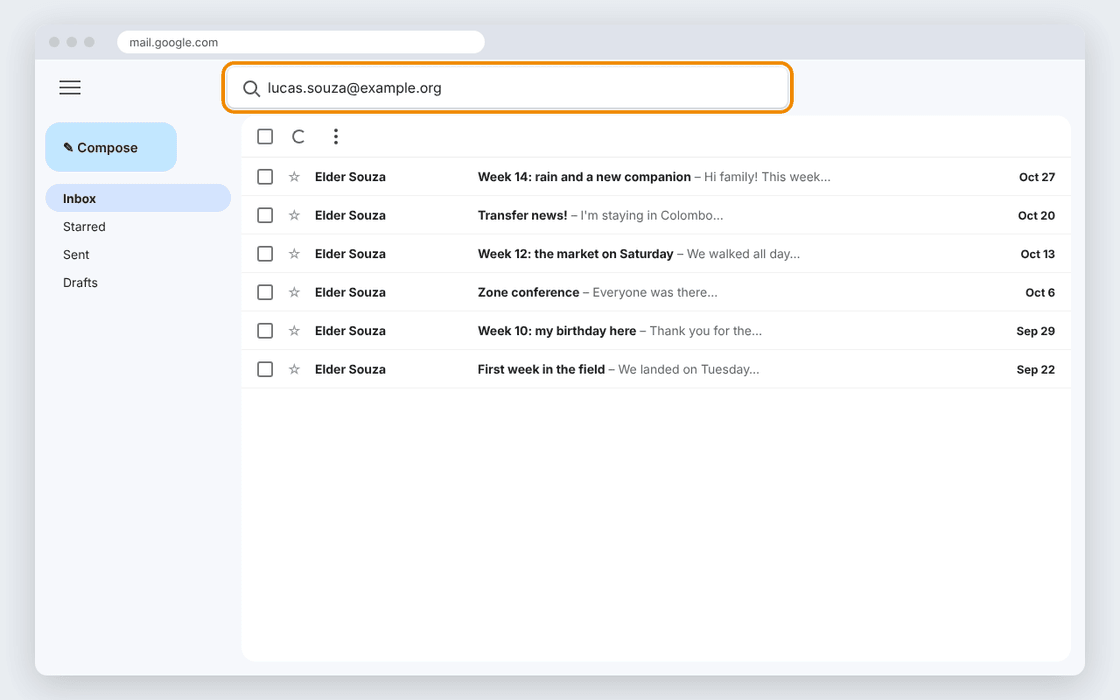
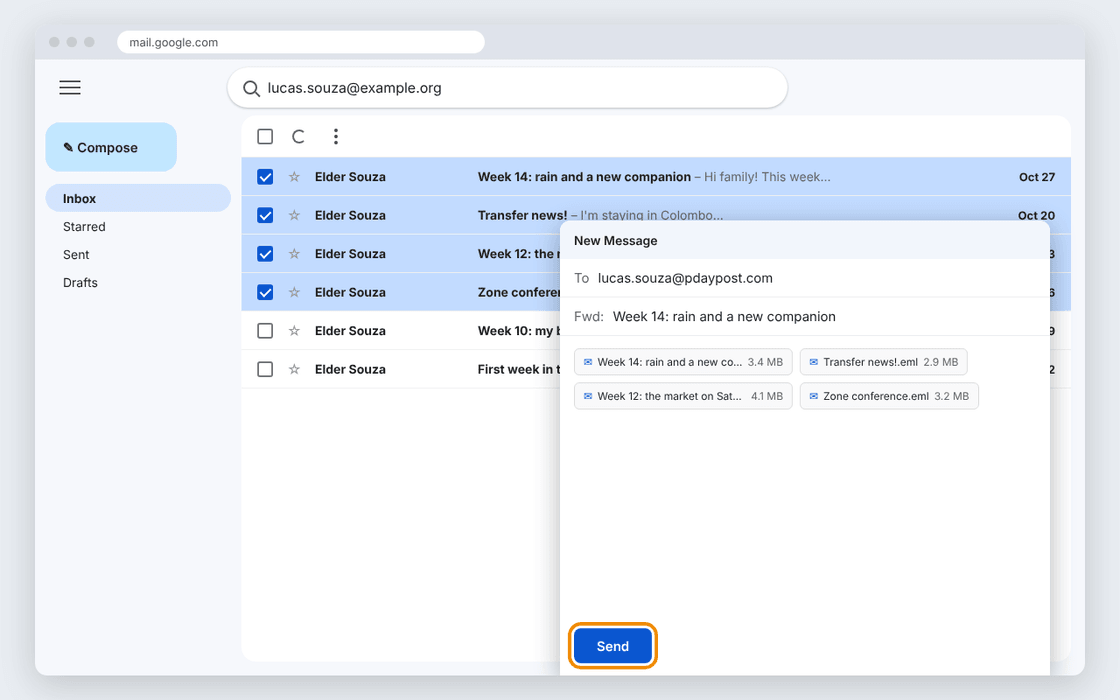
Open Gmail on a computer and search for the missionary's email address, so only their letters stay in the list.
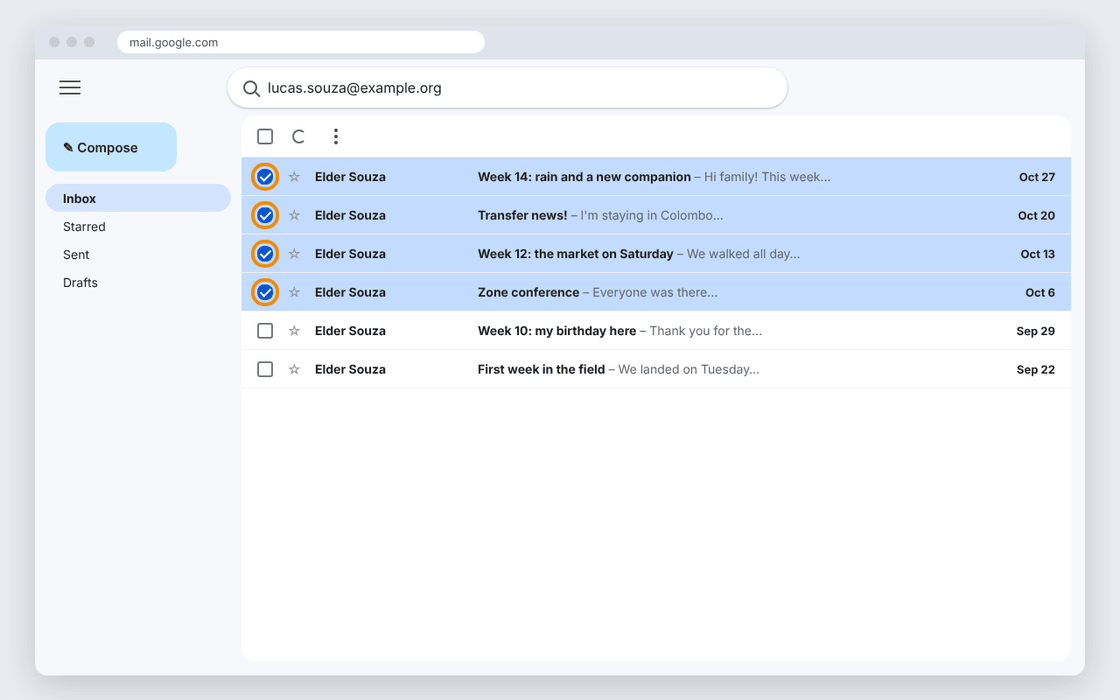
Tick the box beside a few letters, up to 25 MB together: Gmail turns a bigger email into a Drive link, which PdayPost can't open.
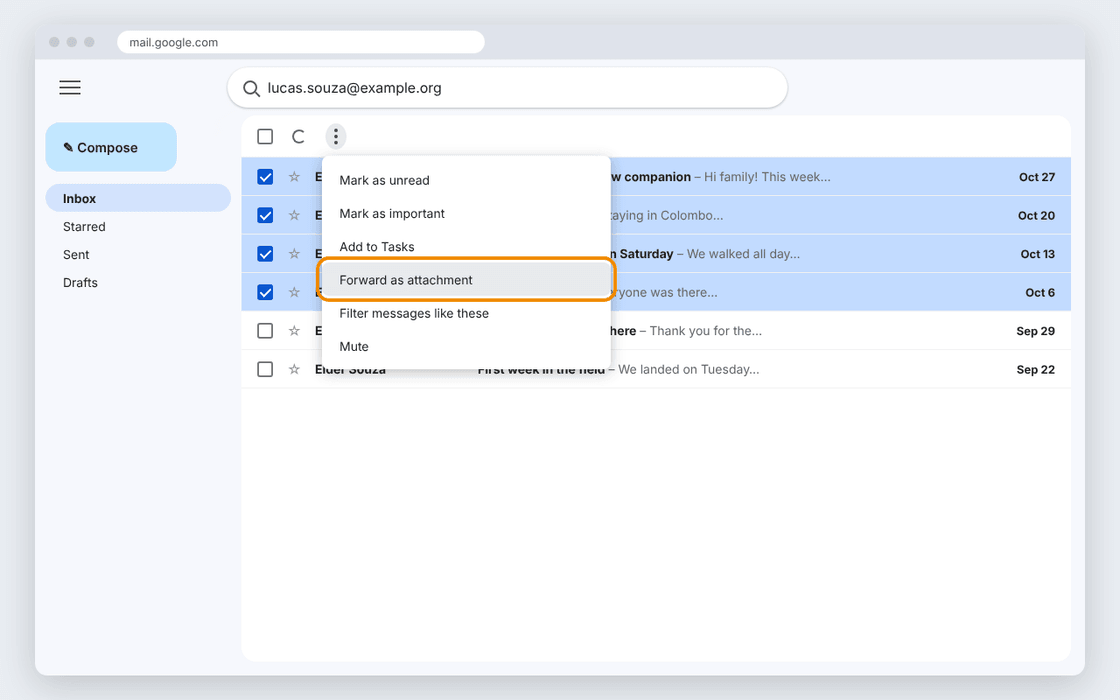
Click the three dots above the list, then Forward as attachment.
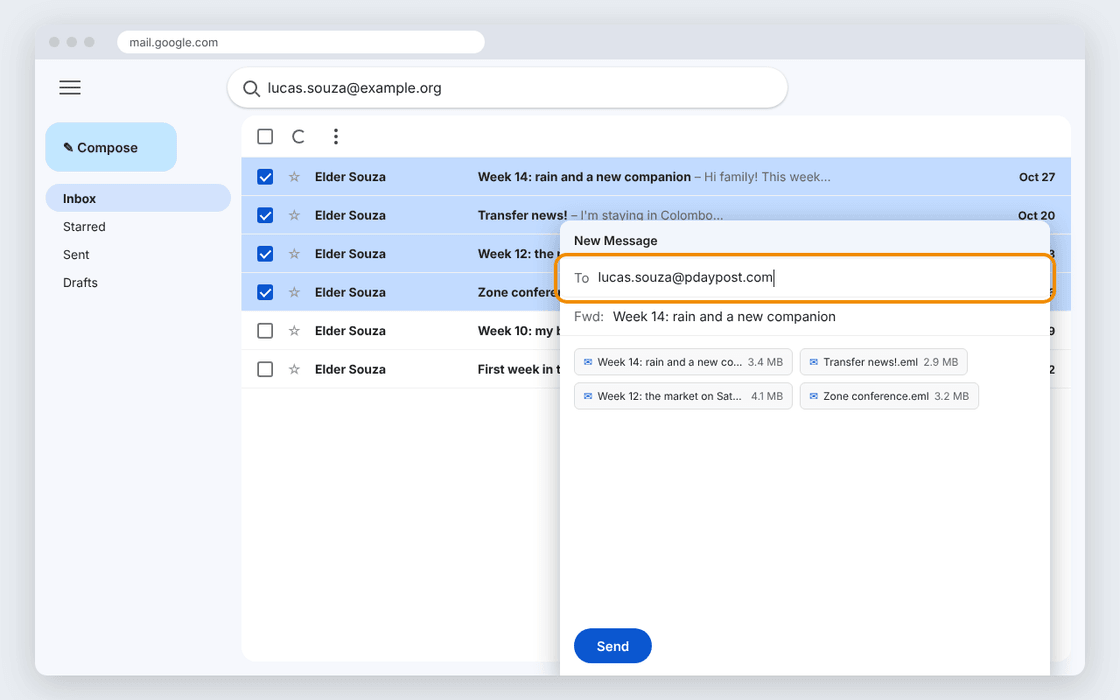
A new email opens with those letters attached, each with its size. In To, type your mission's PdayPost address.
Click Send. Each letter arrives as its own letter, with the day it was written. Then do the next few.


Just one letter
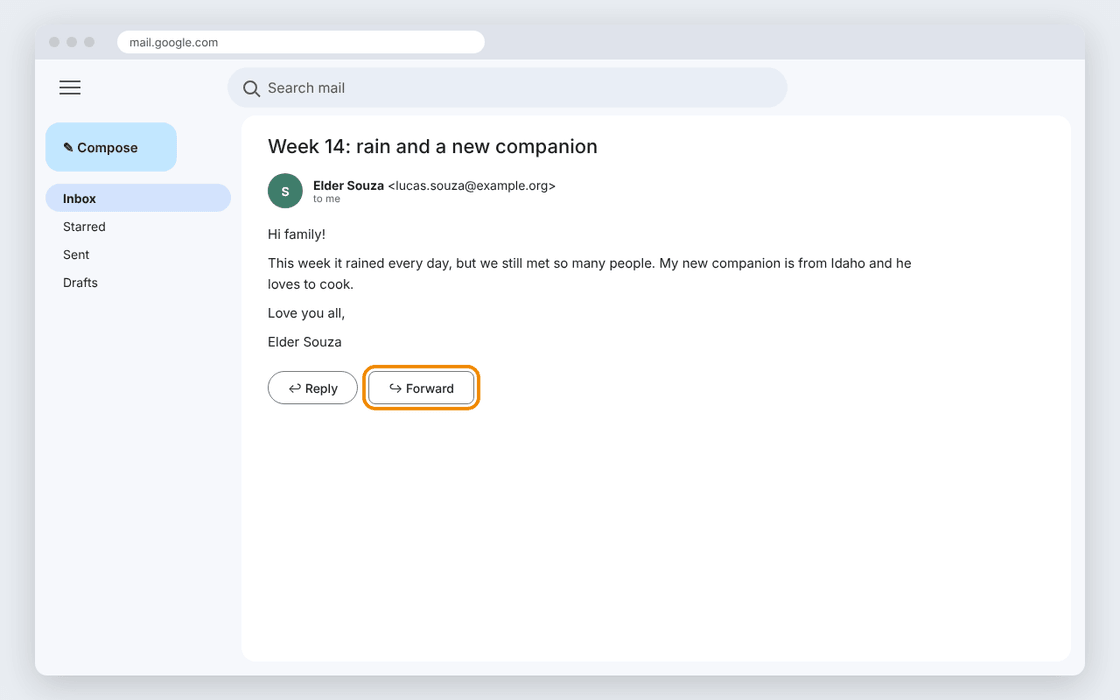
Just one letter? Open it and click Forward under it.
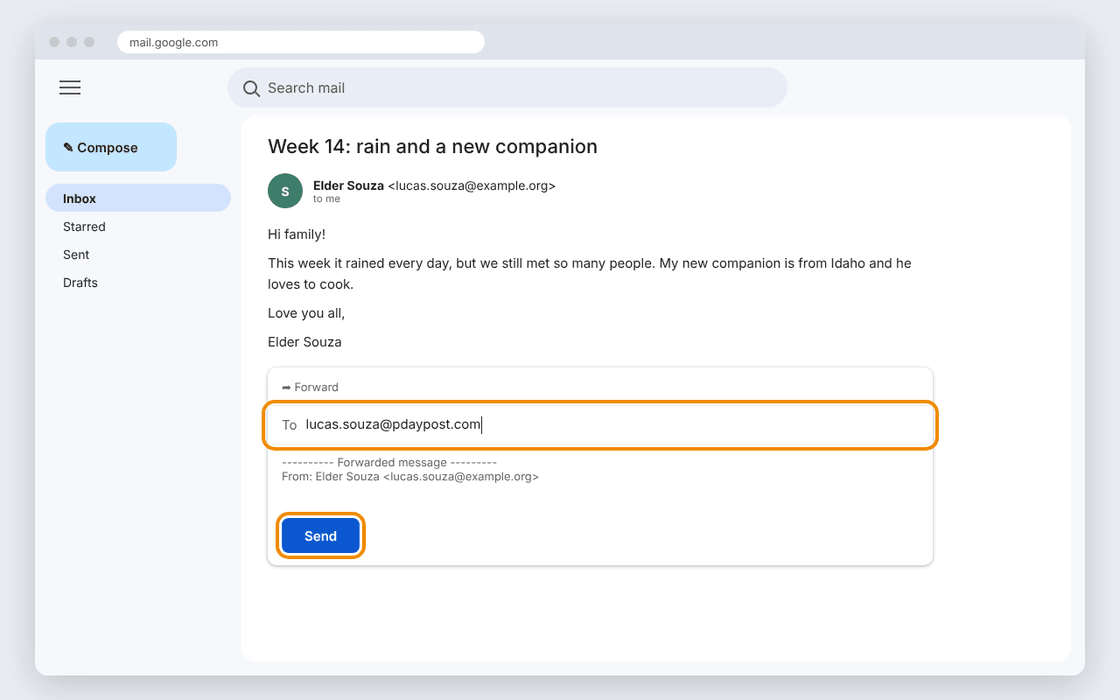
Type your mission's PdayPost address in To and click Send.


On a phone
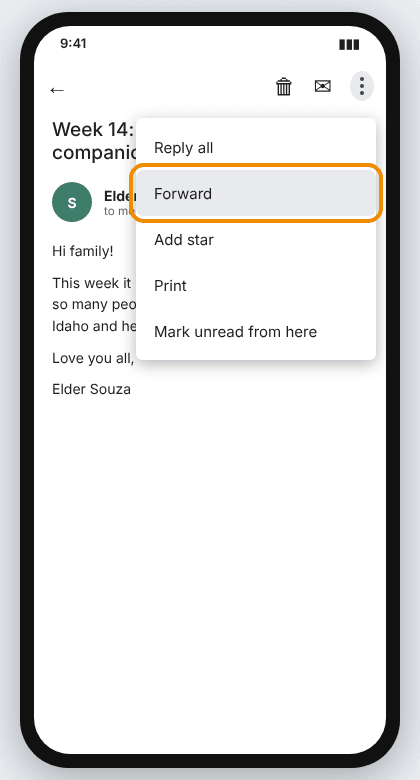
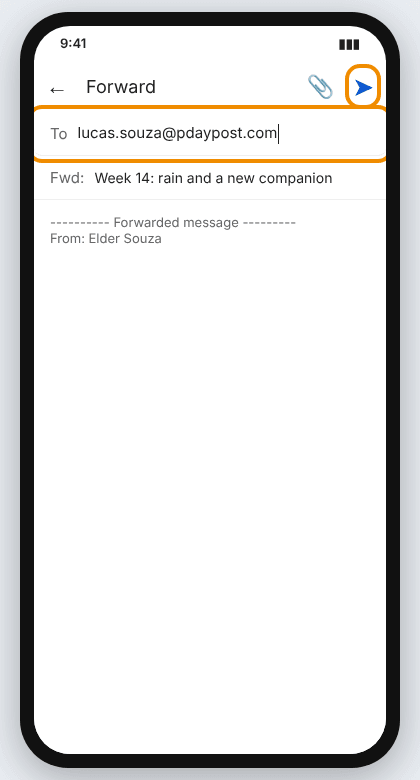
On a phone, open the letter in the Gmail app, tap the three dots at its top right, then Forward.
Type your mission's PdayPost address in To and tap the send arrow.


That's it. The letters show up in your Mission Story within minutes.
Made-up letters and addresses, to show the steps.
This week's letter.
- Open the letter.
- Click Forward (the arrow under the letter, or the three dots at its top right).
- Type the mission's address in To and click Send.
From now on.
- On a computer, click the gear, then See all settings, then Forwarding and POP/IMAP.
- Click Add a forwarding address, type the mission's address and confirm.
- Gmail sends a confirmation code to that address. Open the mission's home on PdayPost: the code is shown there. Type it in Gmail and click Verify.
- Still in Settings, open Filters and Blocked Addresses and click Create a new filter.
- In From, type the missionary's address, then click Create filter.
- Tick Forward it to, choose the mission's address and click Create filter.
The letters already there.
- Search for the missionary's address so only the missionary's letters are listed.
- Tick a few letters at a time, up to 25 MB together: Gmail sends a bigger email as a Google Drive link, which PdayPost can't open.
- Click the three dots above the list and choose Forward as attachment.
- Type the mission's address in To and send. Each letter arrives as its own email with its original date. Then tick the next few.
Each forwarded letter shows up on the mission's timeline within a few minutes once the missionary's consent is in place.